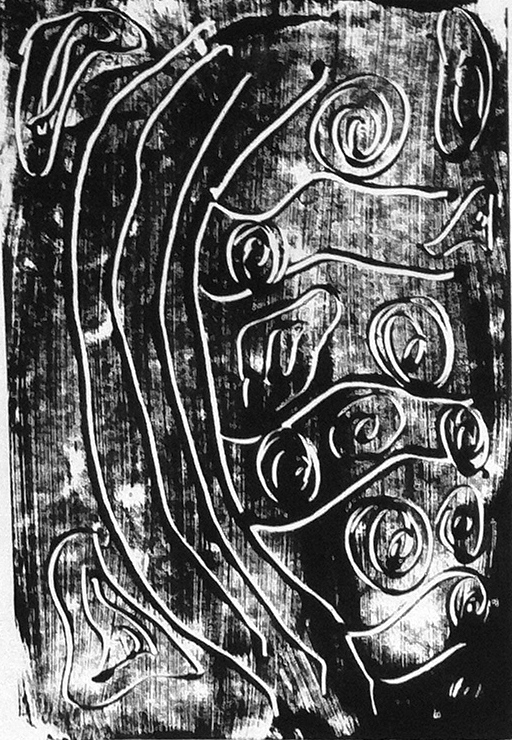
Art work: Mimi Spirits by Thompson Nganjmirra - Mimi spirits are nonphysical beings who have been present and active since Creation and are attributed to the Kunwinjku people, of Kakadu.
This blog has been developed to display my work for the City and Guild Level III Certificate in Embroidery with Sian Martin of Distant Stitch and other interesting photos of Australia and inspirations from my travels around the world.
Examples of fabric dyed using the Shibori method at a Summer School I attended at the Sydney School of Art:
The samples below show cotton voile dyed with natural Indigo dye using the Shibori technique and various resists. These are from top left clockwise:
tying small sections of fabric with rubber bands to achieve random circles;
folding the fabric and tying wood blocks over a large area to achieve large blocks of colour;
folding in narrow folds and clamping with bull dog clips; and
folding in narrow folds and placing rubber bands at various intervals down the length of fabric.
Below: Silk habutae dyed with Indigo and natural dyes. Some samples were overdyed using different resists for each dye bath. Natural dyes used were: Australian Eucalypt leaves, Cootamundra wattle leaves and the leaf of another wattle species. Mordants used were: Alum with wattle (soft yellow colour); copper with one wattle species and iron with the eucalypt leaves. This produced soft yellow to dark brown/black effects. Indigo overdyed with natural dye using Eucalyptus produced a rich yet subtle dark brown colour.
Below: Silk habutae and twill were dyed with Indigo dye in the Shibori technique using clamping, sewing and tying as resists. One piece tied small sections of fabric over buttons of different sizes (No 3). This resulted in some interesting efffects where the image of the button was transferred to the surface of the silk.
Patterned paper using ink marks made by cardboard application. Different widths of cardboard were cut to produce marks. Serrations were made on some edges to produce a stripy effect to emulate feathers or markings. Lower markings were made with reinforced cardboard with the cut edge revealing the central core to produce a mottled effect.
Patterned paper using bleached markings. Paper was painted with ink, bleach was applied with different media including cotton bud and serrated card edge.
Animal markings made by rubbing over patterned surface using pencil and charcoal. Surfaces used include cane, brick, wood decking, cement and metal grating. I also placed lentils on a board to create a spotted effect however this was a bit difficult to control but did produce some irregular effects.
Patterns created using glass printing, painted with emulsion paint and etched with plastic and cardboard card, round and chisel sponges and paint brush. I really enjoyed this technique particularly the flexibility it allows in creating and changing patterns.
Enlarged photocopies of animal pictures showing clear patterns of markings.
Linear drawings overlaid on photographs to help observe and understand the markings.
Photocopy of owl highlighting head feathers and drawings depicting patterns of light and shade, feathers around eyes and light and dark areas of shading.
Wild bird feathers displaying a variety of patterns, texture and tonal variations. Drawing depicts stylised version of patterns with future stitching and design work in mind.
Bird feathers showing marked contrast between light and dark and varying patterns which can be translated into simple drawings and stitchery.
Line drawing depicting patterns on turtle shell and skin. Shell markings form geometric and tonal patterns which lend themselves to design work. The head and eye of the turtle have been stylised and interpreted into shape and pattern for future design potential.
Enlarged pictures of various turtle shell patterns depicted in simplified line drawings provide inspiration for design and texture. Patterns incorporate geometric, symmetrical and spotted design. Texture of skin provides a balanced contrast to the geometric shell patterns.
Crocodile teeth provide inspiration for decorative effects such as clasps. Line drawing follows contour of the teeth for stylised pattern ideas. The pattern of veins in the lower jaw provide unusual designs and shapes.
Skin patterns and texture are depicted in simplified drawings to help observe and understand the tone and shape of markings.
Lizard skin texture and tone are ideal for developing stitched designs.
Pattern and texture of scales inspire geometric designs. Shapes of the body such as a hind leg leads to developing shapes and tones for further decorative design ideas.
Decorative stitches using black thread on homespun (off-white) fabric:
a - zig zag stitch changing stitch length
b - zig zag stitch changing stitch length and distance between rows
c - three step zig zag changing stitch width
d - straight stitching worked in non parallel rows sewn to the edge of the fabric
e - decorative satin stitch changing width, length and row spacing
f - whip stitch using zig zag with black thread and loose bobbin tension
g - whip stitch with white top thread and black bobbin thread, creates a dotted effect as white thread is not clearly visible
h - whip stitch using straight stitch and white thread in top spool
i - cable stitch using black perle thread (No 5) in the bobbin and white thread on top, changed thread to thinner (No 8) half way through and increased stitch length and space between rows to create tonal changes
j - cable stitch using white No 8 perle thread in the bobbin and black cotton on top, varying stitch length and space between rows
k - cable stitch using three step zig zag stitch with stitching in different directions and crossing lines of stitching to create variations in tone
l - quilt stitch used with varied stitch length with black thread in the bobbin and transparent monofilament in the top thread, creating a spotted effect
Cable stitch samples using different yarns and background fabrics:
White cotton perle and lustrous yarn on white background with black cotton thread providing texture and pattern with a netted effect
Black perle on white and black background fabric with white cotton providing a fragile, broken pattern
Tapestry wool gives a softer matt effect
Just for fun I have created some decorative stitch effects using white thread on black fabric. I had the opportunity to use my mother's fabulous new sewing machine and had some fun with the lettering and decorative stitch functions.
From the many choices available I chose stitches that resembled animal markings in combinations and variations in stitch size.
I thought it would be fun to create words with stitching to match those I had used to describe the animals and markings in pictures I had collected. Along with this some relevant stitches have been added to highlight this.
Greek and Chinese lettering add some interesting variation if not sense :-)
Working Sheet:
Experimenting with decorative stitches to resemble animal markings.
White thread was used on black marbled cotton fabric. Stitches used are: zig zag, three step zig zag, hem stitch using different widths and lengths.
Overlaying stitches and stitching across in three step zig zag creates spaces and imagery of reptile and tortoise skin. Zig zag in different lengths and widths resembles the feathers of an owl. Feather stitch in different directions resembles the feather markings around the owl's eyes.
Three tonal columns using different techniques to illustrate shading. From left to right these are: a. adding additional stitches to the design b. varying spacing using overlap to grade shading c. varying thickness of threads - No 12, 8 and 5 perle cotton, stranded cotton, tapestry yarn
Three tonal columns showing reverse side of finished sample. The tonal variations are still evident with the less precise, more freestyle, random stitching. Interesting effects to consider for alternative ways to stitch samples and further development in projects for this Module.
From wondering how I would like this element having not done blackwork before I became entranced in its effect once I started to stitch the samples. After some research on the internet I then found some wonderful designs and ideas for inspiration (below). I have fallen in love with blackwork and want to do more and more.
Jack Robinson panel using blackwork stitches and technique highlighted with colour. Beautiful peice based on traditional Elizabethan blackwork. This example is a wonderful illustration of how variety in stitches compensates for lack of variety of colour. It also shows how gold thread has been included for highlighted and richer effect as was customary in the works of the 16C.
Another example based on Elizabethan blackwork by Leon Conrad called 'Medieval Majesty'. Leon has some inspirational designs and other useful information at www.leonconraddesigns.freeserve.co.uk
A fabulous range of patters of all types found at: http://www.blackworkarchives.com